
Figure.1
| PolarSPARC |
Quick Primer on Ollama
| Bhaskar S | *UPDATED*04/16/2025 |
Overview
Ollama is a powerful open source platform that simplifies the process of running various Large Language Models (or LLM s for short) on a local machine. It enables one to download the various pre-trained LLM models such as, DeepSeek-R1, Google Gemma-3, IBM Granite 3.3, Microsoft Phi-4, etc., and run them locally.
In addition, the Ollama platform exposes a local API endpoint, which enables developers to build AI applications/workflows that can interact with the local LLMs using the API endpoint.
Last but not the least, the Ollama platform effectively leverages the underlying hardware resouces of the local machine, such as CPU(s) and GPU(s), to efficiently and optimally run the LLMs for better performance.
In this primer, we will demonstrate how one can effectively setup and run the Ollama platform using the Docker image.
Installation and Setup
The installation and setup will can on a Ubuntu 24.04 LTS based Linux desktop OR a Apple Silicon based Macbook Pro. Ensure that Docker is installed and setup on the desktop (see instructions).
For Linux and MacOS, ensure that the Python 3.1x programming language as well as the Jupyter Notebook packages are installed. In addition, ensure the command-line utilities curl and jq are installed.
For Linux and MacOS, we will setup two required directories by executing the following command in a terminal window:
$ mkdir -p $HOME/.ollama/open-webui
For Linux and MacOS, to pull and download the docker image for Ollama, execute the following command in a terminal window:
$ docker pull ollama/ollama:0.6.5
The following should be the typical output:
0.6.5: Pulling from ollama/ollama
d9802f032d67: Pull complete
161508c220d5: Pull complete
0d15e460e575: Pull complete
f45c5ef3e181: Pull complete
Digest: sha256:96b7667cb536ab69bfd5cc0c2bd1e29602218e076fe6d34f402b786f17b4fde0
Status: Downloaded newer image for ollama/ollama:0.6.5
docker.io/ollama/ollama:0.6.5
For Linux and MacOS, to pull and download the docker image for open-webui, execute the following command in a terminal window:
$ docker pull ghcr.io/open-webui/open-webui:0.6.5
The following should be the typical output:
0.6.5: Pulling from open-webui/open-webui
8a628cdd7ccc: Pull complete
2a47a8c4fd5c: Pull complete
9c538fc35491: Pull complete
47bbb0afa7fe: Pull complete
782acb99e453: Pull complete
4f4fb700ef54: Pull complete
b7915144f9c7: Pull complete
633be3c6bab0: Pull complete
266a80d83771: Pull complete
7b4a3fa111d1: Pull complete
693caf783e3a: Pull complete
ec0cdf90a948: Pull complete
39845d3298e5: Pull complete
55245328d5ea: Pull complete
87ea629f5ffc: Pull complete
Digest: sha256:fe7a6870ec6b2fd540c0f2007e6aa812dc4bf04a2d0a305bb344eeb10de0a7b7
Status: Downloaded newer image for ghcr.io/open-webui/open-webui:0.6.5
ghcr.io/open-webui/open-webui:0.6.5
For Linux and MacOS, to install the necessary Python packages, execute the following command:
$ pip install ollama pydantic
This completes all the system installation and setup for the Ollama hands-on demonstration.
Hands-on with Ollama
In the following sections, we will show the commands for both Linux and MacOS, however, we will only show the output from Linux. Note that all the commands have been tested on both Linux and MacOS respectively.
Assuming that the ip address on the Linux desktop is 192.168.1.25, start the Ollama platform by executing the following command in the terminal window:
$ docker run --rm --name ollama --network="host" -p 192.168.1.25:11434:11434 -v $HOME/.ollama:/root/.ollama ollama/ollama:0.6.2
For MacOS, start the Ollama platform by executing the following command in the terminal window:
$ docker run --rm --name ollama -p 11434:11434 -v $HOME/.ollama:/root/.ollama ollama/ollama:0.6.5
The following should be the typical trimmed output for Linux:
-----[TRIM]-----
2025/04/16 20:15:21 routes.go:1230: INFO server config env="map[CUDA_VISIBLE_DEVICES: GPU_DEVICE_ORDINAL: HIP_VISIBLE_DEVICES: HSA_OVERRIDE_GFX_VERSION: HTTPS_PROXY: HTTP_PROXY: NO_PROXY: OLLAMA_CONTEXT_LENGTH:2048 OLLAMA_DEBUG:false OLLAMA_FLASH_ATTENTION:false OLLAMA_GPU_OVERHEAD:0 OLLAMA_HOST:http://0.0.0.0:11434 OLLAMA_INTEL_GPU:false OLLAMA_KEEP_ALIVE:5m0s OLLAMA_KV_CACHE_TYPE: OLLAMA_LLM_LIBRARY: OLLAMA_LOAD_TIMEOUT:5m0s OLLAMA_MAX_LOADED_MODELS:0 OLLAMA_MAX_QUEUE:512 OLLAMA_MODELS:/root/.ollama/models OLLAMA_MULTIUSER_CACHE:false OLLAMA_NEW_ENGINE:false OLLAMA_NOHISTORY:false OLLAMA_NOPRUNE:false OLLAMA_NUM_PARALLEL:0 OLLAMA_ORIGINS:[http://localhost https://localhost http://localhost:* https://localhost:* http://127.0.0.1 https://127.0.0.1 http://127.0.0.1:* https://127.0.0.1:* http://0.0.0.0 https://0.0.0.0 http://0.0.0.0:* https://0.0.0.0:* app://* file://* tauri://* vscode-webview://* vscode-file://*] OLLAMA_SCHED_SPREAD:false ROCR_VISIBLE_DEVICES: http_proxy: https_proxy: no_proxy:]"
time=2025-03-22T19:05:49.293Z level=INFO source=images.go:432 msg="total blobs: 19"
time=2025-03-22T19:05:49.293Z level=INFO source=images.go:439 msg="total unused blobs removed: 0"
time=2025-03-22T19:05:49.293Z level=INFO source=routes.go:1297 msg="Listening on [::]:11434 (version 0.6.2)"
time=2025-03-22T19:05:49.293Z level=INFO source=gpu.go:217 msg="looking for compatible GPUs"
time=2025-03-22T19:05:49.298Z level=INFO source=gpu.go:377 msg="no compatible GPUs were discovered"
time=2025-03-22T19:05:49.298Z level=INFO source=types.go:130 msg="inference compute" id=0 library=cpu variant="" compute="" driver=0.0 name="" total="62.7 GiB" available="56.5 GiB"
Notice that we are using the host networking option with docker on Linux for a reason that will become evident very soon.
If the linux desktop has Nvidia GPU with decent amount of VRAM and has been enabled for use in docker (see instructions), then execute the following command instead to start Ollama:
$ docker run --rm --name ollama --gpus=all --network="host" -p 192.168.1.25:11434:11434 -v $HOME/.ollama:/root/.ollama ollama/ollama:0.6.5
On the MacOS, currently there is NO SUPPORT for the Apple Silicon GPU and the above command WILL NOT work !!!
For the hands-on demonstration, we will download and use the Microsoft Phi-4 Mini pre-trained LLM model on Linux and IBM Granite-3.3 2B pre-trained LLM model on MacOS.
On MacOS, ollama only seems to allow 8GB and hence LLM models that fit into 8GB will work !!!
For Linux, open a new terminal window and execute the following docker command to download the LLM model:
$ docker exec -it ollama ollama run phi4-mini
For MacOS, open a new terminal window and execute the following docker command to download the LLM model:
$ docker exec -it ollama ollama run granite3.3:2b
The following should be the typical output on Linux:
pulling manifest
pulling 377655e65351... 100%  ||||||||||||||||||||||||||||||||||||||||||||||||||||||||||||||||||||  3.3 GB
pulling e0a42594d802... 100%  ||||||||||||||||||||||||||||||||||||||||||||||||||||||||||||||||||||   358 B
pulling dd084c7d92a3... 100%  ||||||||||||||||||||||||||||||||||||||||||||||||||||||||||||||||||||  8.4 KB
pulling 0a74a8735bf3... 100%  ||||||||||||||||||||||||||||||||||||||||||||||||||||||||||||||||||||    55 B
pulling ffae984acbea... 100%  ||||||||||||||||||||||||||||||||||||||||||||||||||||||||||||||||||||   489 B
verifying sha256 digest
writing manifest
success
After the pre-trained LLM model is downloaded successfully, the command would wait for an user input.
To test the just downloaded LLM model, execute the following user prompt:
>>> describe a gpu in less than 50 words in json format
The following should be the typical output on Linux:
```json
{
  "gpu": {
    "description": "A specialized electronic circuit designed to accelerate graphics processing and complex computations,
commonly used for gaming or professional visualization."
  }
}
```
To exit the user input, execute the following user prompt:
>>> /bye
Now, we will shift gears to test the local API endpoint.
For Linux, open a new terminal window and execute the following command to list all the LLM models that are hosted in the running Ollama platform:
$ curl -s http://192.168.1.25:11434/api/tags | jq
For MacOS, open a new terminal window and execute the following command to list all the LLM models that are hosted in the running Ollama platform:
$ curl -s http://127.0.0.1:11434/api/tags | jq
The following should be the typical output on Linux:
{
  "models": [
    {
      "name": "phi4-mini:latest",
      "model": "phi4-mini:latest",
      "modified_at": "2025-03-09T18:13:49.120068131Z",
      "size": 2491876774,
      "digest": "78fad5d182a7c33065e153a5f8ba210754207ba9d91973f57dffa7f487363753",
      "details": {
        "parent_model": "",
        "format": "gguf",
        "family": "phi3",
        "families": [
          "phi3"
        ],
        "parameter_size": "3.8B",
        "quantization_level": "Q4_K_M"
      }
    }
  ]
}
From the Output.6 above, it is eveident we only have one LLM model based on Linux or MacOS !
Moving along to the next task !
For Linux, to send a user prompt to the LLM model for a response, execute the following command:
$ curl -s http://192.168.1.25:11434/api/generate -d '{
  "model": "phi4-mini:latest",
  "prompt": "describe a gpu in less than 50 words",
  "stream": false
}' | jq
For MacOS, to send a user prompt to the LLM model for a response, execute the following command:
$ curl -s http://127.0.0.1:11434/api/generate -d '{
  "model": "granite3.1-moe:1b",
  "prompt": "describe a gpu in less than 50 words",
  "stream": false
}' | jq
The following should be the typical output on Linux:
{
  "model": "phi4-mini:latest",
  "created_at": "2025-03-21T19:15:47.746027454Z",
  "response": "A GPU (Graphics Processing Unit) accelerates rendering tasks by handling multiple processes simultaneously, ideal for intensive graphical computations.",
  "done": true,
  "done_reason": "stop",
  "context": [
    200021, 24346, 261, 82563, 306, 3760, 1572, 220, 1434, 6391, 200020, 200019, 32, 47969, 350, 27141, 44532, 14856,
    8, 21798, 1381, 42827, 13638, 656, 17491, 7598, 14340, 38328, 11, 9064, 395, 48343, 94357, 192859, 13
  ],
  "total_duration": 1554600927,
  "load_duration": 23546503,
  "prompt_eval_count": 12,
  "prompt_eval_duration": 64126246,
  "eval_count": 24,
  "eval_duration": 1466450705
}
WALLA - we have successfully tested the local API endpoints !
Now we will shift gears to get our hands dirty with Open WebUI, which is another open source project that provides an extensible, feature-rich, and user-friendly self-hosted WebUI designed to operate entirely offline. It supports various LLM runners, including Ollama and other OpenAI-compatible APIs.
On Linux, to start the Open WebUI platform, execute the following command in a new terminal window:
$ docker run --rm --name open-webui --network="host" --add-host=host.docker.internal:host-gateway -p 192.168.1.25:8080:8080 -v $HOME/.ollama/open-webui:/app/backend/data -e WEBUI_AUTH=False -e OLLAMA_API_BASE_URL=http://192.168.1.25:11434/api ghcr.io/open-webui/open-webui:0.5.20
Note that because of the docker command line option --network="host", we are able to use the host ip address 192.168.1.25.
On MacOS, to start the Open WebUI platform, execute the following command in a new terminal window:
$ docker run --rm --name open-webui -p 8080:8080 -v $HOME/.ollama/open-webui:/app/backend/data -e WEBUI_AUTH=False -e OLLAMA_API_BASE_URL=http://127.0.0.1:11434/api ghcr.io/open-webui/open-webui:0.6.5
The following should be the typical trimmed output on Linux:
-----[TRIM]-----
WARNING: CORS_ALLOW_ORIGIN IS SET TO '*' - NOT RECOMMENDED FOR PRODUCTION DEPLOYMENTS.
INFO  [open_webui.env] Embedding model set: sentence-transformers/all-MiniLM-L6-v2
WARNI [langchain_community.utils.user_agent] USER_AGENT environment variable not set, consider setting it to identify your requests.
-----[TRIM]-----
Fetching 30 files: 100%|++++++++++| 30/30 [00:00<00:00, 24604.83it/s]
INFO:     Started server process [1]
INFO:     Waiting for application startup.
2025-04-16 20:47:49.243 | INFO     | open_webui.utils.logger:start_logger:140 - GLOBAL_LOG_LEVEL: INFO - {}
On Linux, the docker command option --add-host=host.docker.internal:host-gateway along with the "host" network option is very IMPORTANT as it enables a container to connect to services on the host
On Linux, open the web browser and enter the URL link http://192.168.1.25:8080 and on MacOS, open the web browser and enter the URL link http://127.0.0.1:8080.
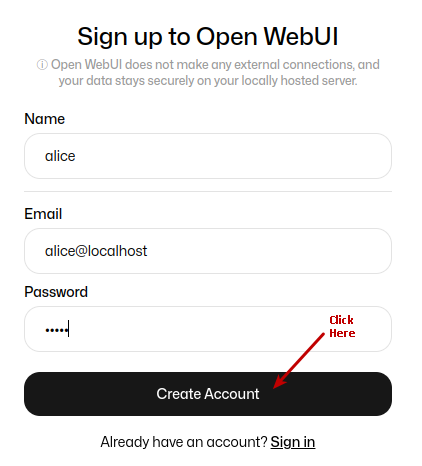
The following illustration depicts the browser presented to the user on launch on Linux:
Click on the Okay, Let's Go! button to navigate to the main screen as shown in the following illustration:
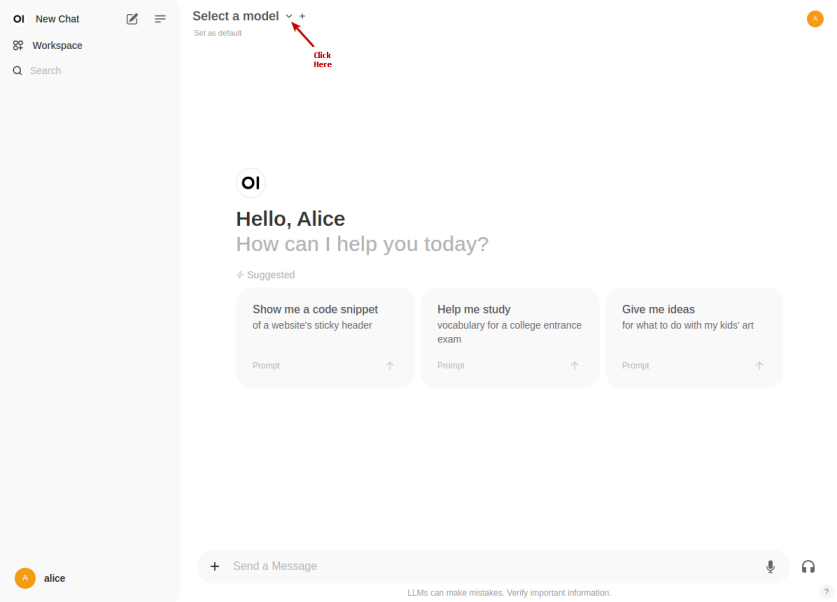
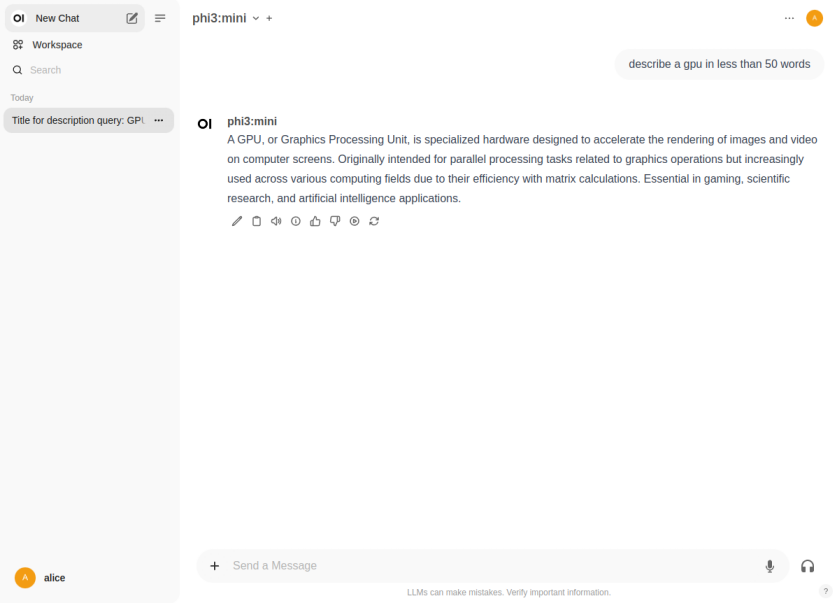
Click on the top left deepseek-r1:1.5b drop-down to select the phi4:latest model as shown in the following illustration:
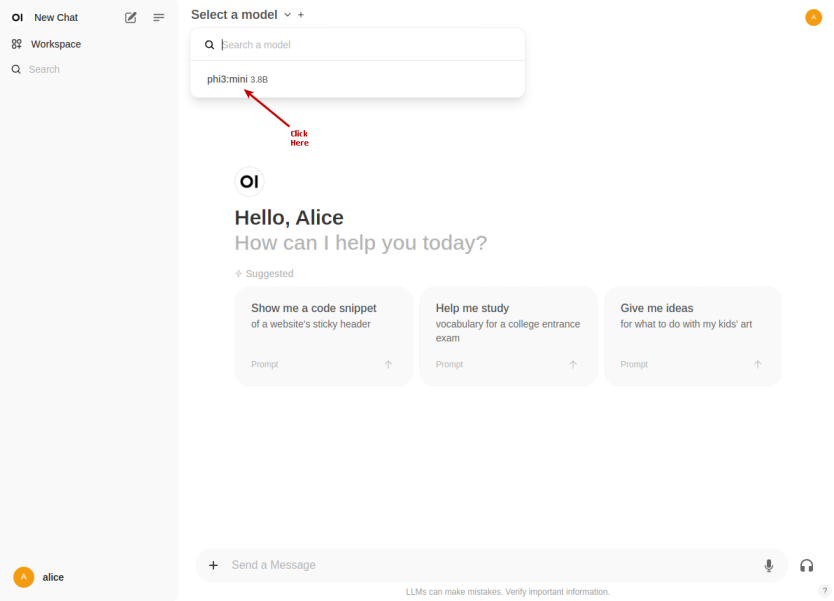
Once the phi4:latest LLM model is selected, one is presented with a screen as shown in the following illustration:
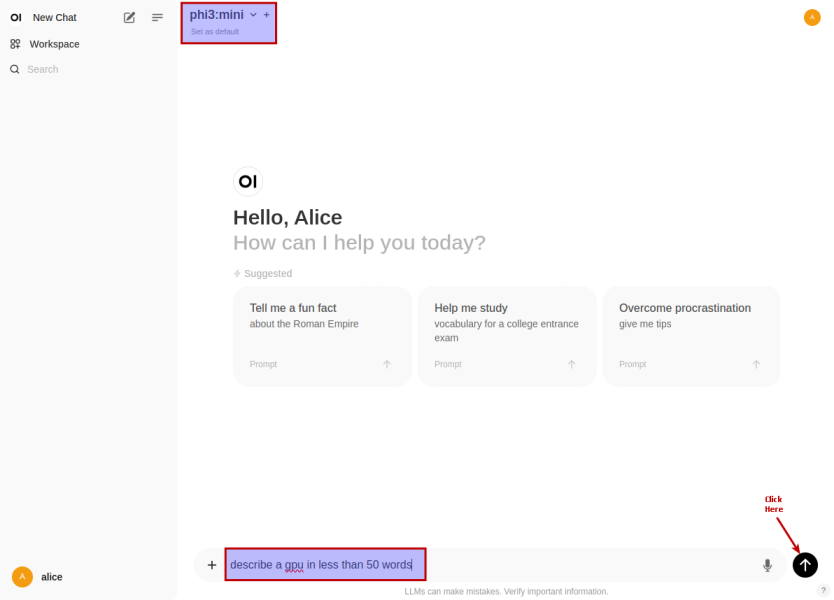
Once we have the LLM model selected, enter a user prompt in the bottom textbox and click on the Up Arrow as shown in the following illustration:
The LLM model will respond with a text corresponding to the user prompt as shown in the following illustration:
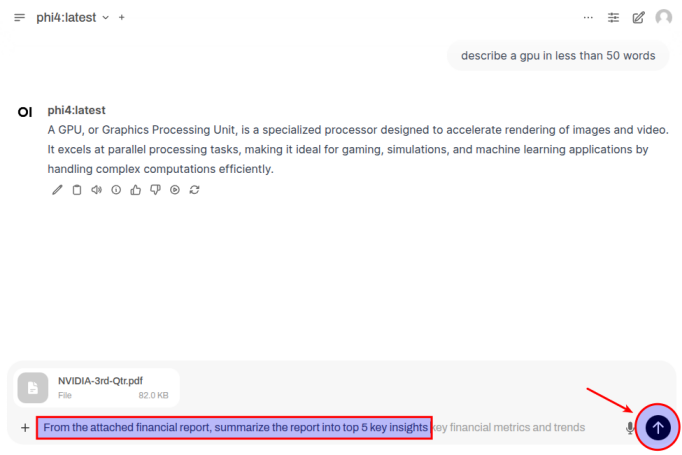
For the next task, we will use the Nvidia 3rd Quarter 2024 financial report to analyze it !!!
First we need to upload the financial report PDF by first clicking on the + and then the Upload Files option as shown in the following illustration:

Once the document has been uploaded, enter a user prompt in the bottom textbox and click on the Up Arrow as shown in the following illustration:
The LLM model will respond with the following response as shown in the following illustration:
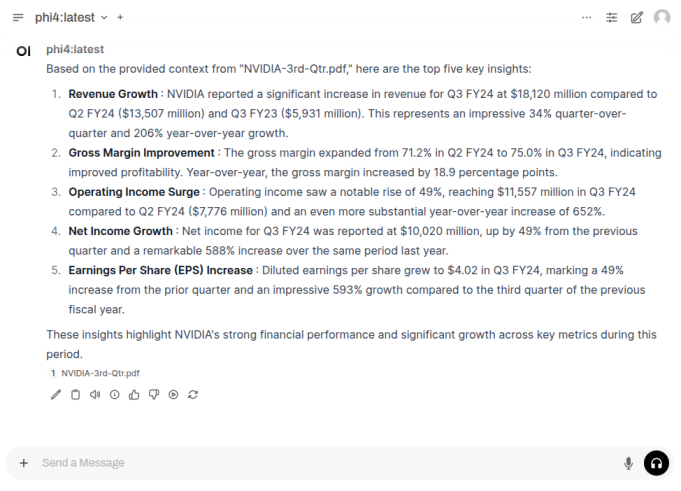
BINGO - we have successfully tested Open WebUI interfacing with Ollama !
Finally, we will test Ollama using Python code snippets.
To list all the LLM models that are hosted in the running Ollama platform, execute the following code snippet:
from ollama import Client

# For Linux
client = Client(host='http://192.168.1.25:11434')

# For MacOS
# client = Client(host='http://127.0.0.1:11434')

client.list()
The following should be the typical output on Linux:
ListResponse(models=[Model(model='phi4-mini:latest', modified_at=datetime.datetime(2025, 3, 9, 22, 13, 49, 120068, tzinfo=TzInfo(UTC)), digest='78fad5d182a7c33065e153a5f8ba210754207ba9d91973f57dffa7f487363753', size=2491876774, details=ModelDetails(parent_model='', format='gguf', family='phi3', families=['phi3'], parameter_size='3.8B', quantization_level='Q4_K_M'))])
To send a user prompt to the LLM model running on the Ollama platform, execute the following code snippet:
# For Linux
client.chat(model='phi4-mini:latest', messages=[{'role': 'user', 'content': 'Describe ollama in less than 50 words'}])

# For MacOS
# client.chat(model='granite3.1-moe:1b', messages=[{'role': 'user', 'content': 'Describe ollama in less than 50 words'}])
The following should be the typical output on Linux:
ChatResponse(model='phi4-mini:latest', created_at='2025-03-22T19:49:21.927511195Z', done=True, done_reason='stop', total_duration=7575004642, load_duration=2016097211, prompt_eval_count=12, prompt_eval_duration=157501430, eval_count=85, eval_duration=5400786171, message=Message(role='assistant', content="OpenAI's successor, Meta's Phi language model developed by Microsoft known as 'Phi'. Phi is designed to provide highly accurate and contextual responses across a wide range of topics. It leverages advanced natural language understanding capabilities.\n\n(Note: As my training only goes up until October 2023 with Microsoft's knowledge cutoff in March 2023 for me, I am unable to describe specific future models or those developed after these dates.)", images=None, tool_calls=None))
For the next task, we will attempt to present the LLM model response in a structured form using a Pydantic data class. For that, we will first define a class object by executing the following code snippet:
from pydantic import BaseModel

class GpuSpecs(BaseModel):
  name: str
  vram: int
  cuda_cores: int
  tensor_cores: int
To receive a LLM model response in the desired format for the specific user prompt from the Ollama platform, execute the following code snippet:
# For Linux
response = client.chat(model='phi4-mini:latest',
                       messages=[{'role': 'user', 'content': 'Extract the GPU specifications for Nvidia RTX 4060 Ti'}],
                       format=GpuSpecs.model_json_schema())

# For MacOS
# response = client.chat(model='granite3.1-moe:1b',
#                        messages=[{'role': 'user', 'content': 'Extract the GPU specifications for Nvidia RTX 4060 Ti'}],
#                        format=GpuSpecs.model_json_schema())
To display the results in the structred form, execute the following code snippet:
# For Linux
rtx_4060 = (GpuSpecs.model_validate_json(response.message.content))

# For MacOS
# rtx_4060 = (GpuSpecs.model_validate_json(response['message']['content']))

rtx_4060
The following should be the typical output on Linux:
GpuSpecs(name='[GPU]NVIDIA RTX 4060 Ti', vram=12, cuda_cores=128, tensor_cores=48)
With this, we conclude the various demonstrations on using the Ollama platform for running and working with the pre-trained LLM models locally !!!
References