Figure.1
| PolarSPARC |
Quick Primer on Gradio
| Bhaskar S | 04/05/2025 |
Overview
AI/ML apps are built to solve specific business or customer problems and are often deployed as a web application. One could levarge the traditional web frameworks such as Flask or Django to build these AI/ML apps. However, these frameworks require a decent amount of web experience and knowledge. What if there existed an easier way to build and deploy AI/ML apps ?
Well, this is where the open-source framework Gradio comes into the picture !!!
Gradio is an open-source Python framework that allows one to quickly build and deploy any AI/ML web application in a short order with zero web experience. In addition, Gradio applications can be deployed in HuggingFace Spaces for sharing with the world.
In this primer, we will demonstrate how one can effectively setup and use the Gradio framework.
Installation and Setup
The installation and setup will be on a Ubuntu 24.04 LTS based Linux desktop. Ensure that Ollama is installed and setup on the desktop (see instructions).
In addition, ensure that the Python 3.x programming language is installed and setup on the desktop.
To install the necessary Python packages, execute the following command in a terminal window:
$ pip install gradio ollama pillow
This completes all the necessaryinstallation and setup for the Gradio hands-on demonstration.
Hands-on with Gradio
In the following paragraphs, we will get our hands dirty with the Gradio framework. So, without further ado, let us get started !!!
The following is our first Gradio Python code:
#
# @Author: Bhaskar S
# @Blog:   https://www.polarsparc.com
# @Date:   23 Mar 2025
#

import gradio as gr

def greet(name: str) -> str:
  return f'Hello, {name}!'

if __name__ == '__main__':
  # Automatically creates Submit and Clear buttons by default
  app = gr.Interface(
    fn=greet,
    inputs=['text'],
    outputs=['text'],
    flagging_mode='never',
    title='Hello Greeter!',
  )

  # Host 127.0.0.1, Port 7860
  app.launch()
To execute the above Python code, execute the following command in a terminal window:
$ python sample-1.py
The following would be the typical output:
* Running on local URL:  http://127.0.0.1:7860

To create a public link, set `share=True` in `launch()`.
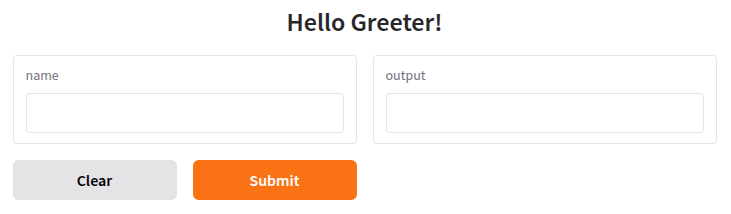
Open a browser and enter the URL link http://127.0.0.1:7860. The following illustration depicts the launched Gradio web application:
Enter a name and click on the Submit button and the following illustration depicts the outcome:
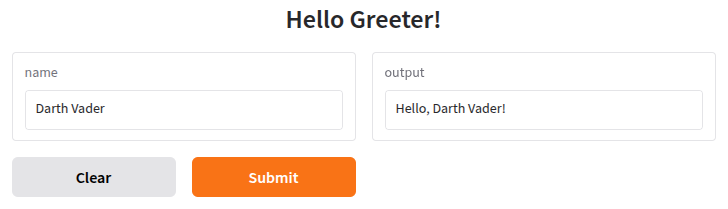
WALLA !!! With just a few lines of Python code, we were able to create and launch a slick web application !!!
The code from sample-1.py above needs some explanation:
The class Interface has the following three core parameters:
The string 'text' in either the inputs or outputs list refers to the UI component Textbox.
The function call launch() with no parameters, launches a simple webserver on the local host (127.0.0.1) on the port 7860.
The Python function greet(name: str) -> str takes as input a set of arguments that matches the number of UI inputs and returns a set of values (as a tuple) that matches the number of UI outputs. In this case, the input is from the UI component Textbox and the output is to the UI component Textbox.
Next, the following is our second Gradio Python code that explicitly uses the Gradio UI components:
#
# @Author: Bhaskar S
# @Blog:   https://www.polarsparc.com
# @Date:   23 Mar 2025
#

import gradio as gr

def greet(name: str) -> str:
  return f'Hello, {name}!'

if __name__ == '__main__':
  # Automatically creates Submit and Clear buttons by default
  app = gr.Interface(
    fn=greet,
    inputs=[gr.Textbox(label='Name', placeholder='enter name here', lines=1)],
    outputs=[gr.Textbox(label='Message', lines=1)],
    flagging_mode='never',
    title='Hello Greeter!',
  )

  # Host 192.168.1.25, Port 8080
  app.launch(server_name='192.168.1.25', server_port=8080)
To execute the above Python code, execute the following command in a terminal window:
$ python sample-2.py
The following would be the typical output:
* Running on local URL:  http://192.168.1.25:8080

To create a public link, set `share=True` in `launch()`.
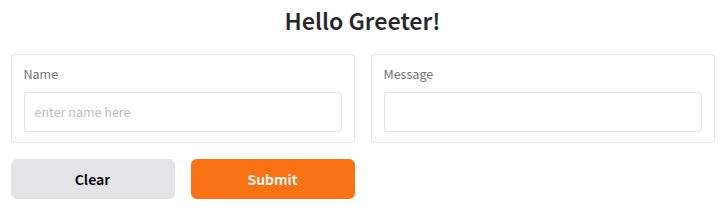
Open a browser and enter the URL link http://192.168.1.25:8080. The following illustration depicts the launched Gradio web application:
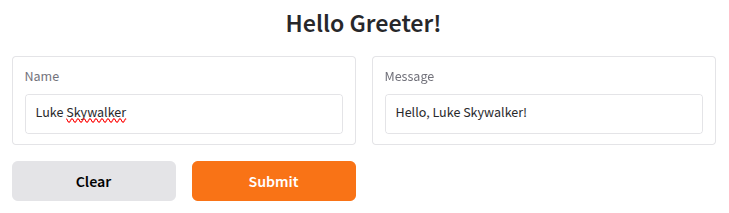
Enter a name and click on the Submit button and the following illustration depicts the outcome:
The code from sample-2.py above needs some explanation:
The class Textbox uses the following parameters to customize the UI component:
The function call launch(server_name, server_port) uses two parameters to specific the network host and the network port on which to start the webserver.
Moving along, the following is our third Gradio Python code that explicitly lays out the various Gradio UI components:
#
# @Author: Bhaskar S
# @Blog:   https://www.polarsparc.com
# @Date:   23 Mar 2025
#

import gradio as gr

def greet(who: str) -> str:
  return f'Hello, {who}!'

if __name__ == '__main__':
  # Explicitly create UI components including buttons
  with gr.Blocks() as app:
    name = gr.Textbox(label='Name', placeholder='enter name here')
    output = gr.Textbox(label='Message')
    greet_btn = gr.Button('Greet')
    reset_btn = gr.Button('Reset')
    greet_btn.click(fn=greet, inputs=[name], outputs=[output])
    reset_btn.click(fn=lambda: [None, None], outputs=[name, output])

  # Host 192.168.1.25, Port 8080
  app.launch(server_name='192.168.1.25', server_port=8080)
To execute the above Python code, execute the following command in a terminal window:
$ python sample-3.py
The output would be similar to that of Output.2 from above.
Open a browser and enter the URL link http://192.168.1.25:8080. The following illustration depicts the launched Gradio web application:
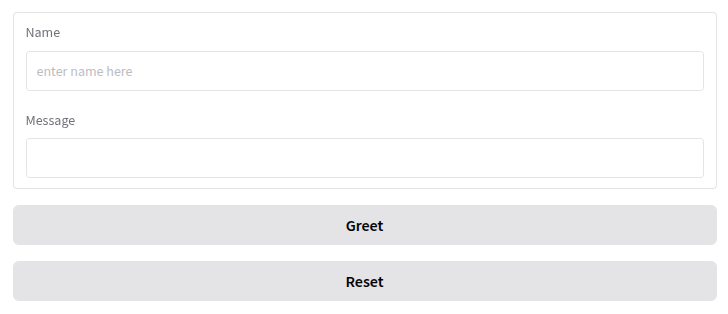
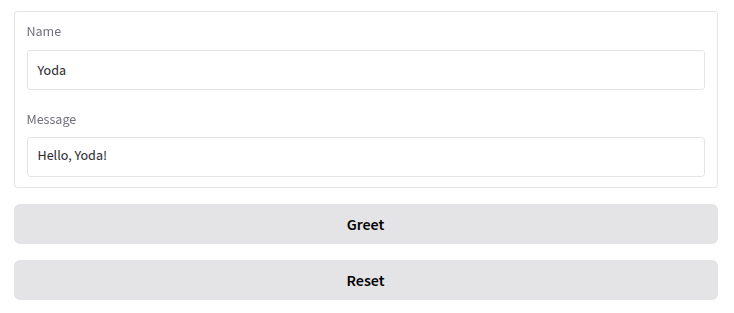
Enter a name and click on the Greet button and the following illustration depicts the outcome:
The code from sample-3.py above needs some explanation:
The context class Blocks allows for a fine-grained control of what UI components to use, how they are configured for event handling, and how they are laid out on the screen.
The class Button uses the label parameter to customize the text label on the button component.
The function call click() on the Button uses the following three parameters:
Notice that the function parameter fn on the Reset button takes in a lambda function that returns a list of None values, which effectively clears the input and output values.
Moving along, the following is our fourth Gradio Python code that adds additional Gradio UI components to the interface:
#
# @Author: Bhaskar S
# @Blog:   https://www.polarsparc.com
# @Date:   29 Mar 2025
#

import gradio as gr

def greet(title: str, name: str, num: int):
  return f'Hello, {title} {name}!', num

if __name__ == '__main__':
  # Automatically creates Submit and Clear buttons by default
  app = gr.Interface(
      fn=greet,
      inputs=[gr.Radio(['Mr', 'Ms']), 'text', 'slider'],
      outputs=['text', 'number'],
      flagging_mode='never',
      title='Hello Greeter (with Title, Number) !',
  )

  # Host 192.168.1.25, Port 8080
  app.launch(server_name='192.168.1.25', server_port=8080)
To execute the above Python code, execute the following command in a terminal window:
$ python sample-4.py
The output would be similar to that of Output.2 from above.
Open a browser and enter the URL link http://192.168.1.25:8080. The following illustration depicts the launched Gradio web application:
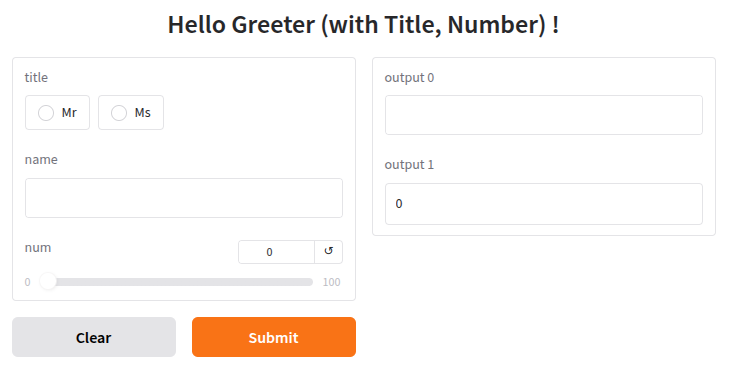
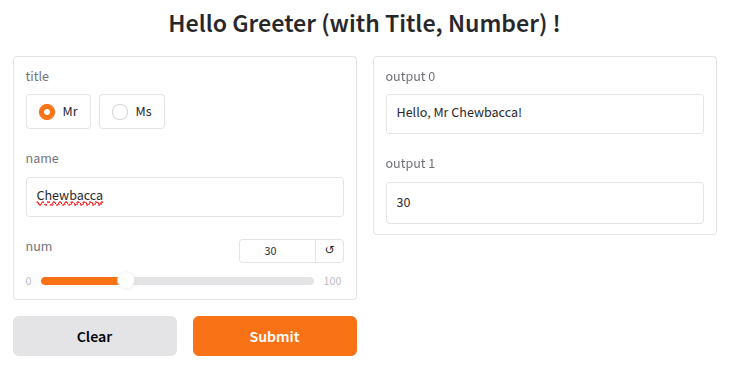
Select a title, enter a name, select a number on the slider, and click on the Submit button and the following illustration depicts the outcome:
The code from sample-4.py above needs some explanation:
The class Radio defines a radio button component and accepts a list of options.
The string 'slider' in the inputs list refers to the UI component Slider with a default minimum value of 0 and a default maximum value of 100.
Shifting gears, the following is our fifth Gradio Python code that demonstrates the use of Gradio image component:
#
# @Author: Bhaskar S
# @Blog:   https://www.polarsparc.com
# @Date:   29 Mar 2025
#

import gradio as gr
import numpy as np

# Apply Sepia filter to the input image (passed in as a numpy array)
def sepia_filter(inp_img):
  filter = np.array([
      [0.393, 0.769, 0.189],
      [0.349, 0.686, 0.168],
      [0.272, 0.534, 0.131]
  ])
  out_img = inp_img.dot(filter.T)
  out_img /= out_img.max()
  return out_img

if __name__ == '__main__':
  # Automatically creates Submit and Clear buttons by default
  app = gr.Interface(
    fn=sepia_filter,
    # Default image type: 'numpy'
    inputs=gr.Image(height=300, width=300),
    outputs='image',
    flagging_mode='never',
    title='Sepia Image Processing !',
  )

  # Host 192.168.1.25, Port 8080
  app.launch(server_name='192.168.1.25', server_port=8080)
To execute the above Python code, execute the following command in a terminal window:
$ python sample-5.py
The output would be similar to that of Output.2 from above.
Open a browser and enter the URL link http://192.168.1.25:8080. The following illustration depicts the launched Gradio web application:
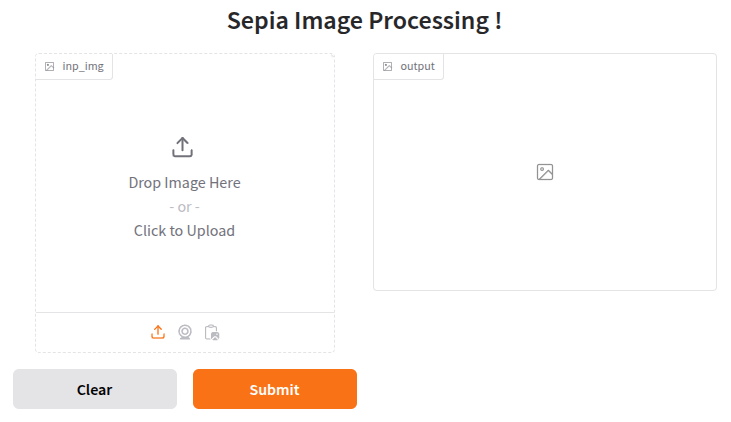
Select an image from the desktop and click on the Submit button and the following illustration depicts the outcome:
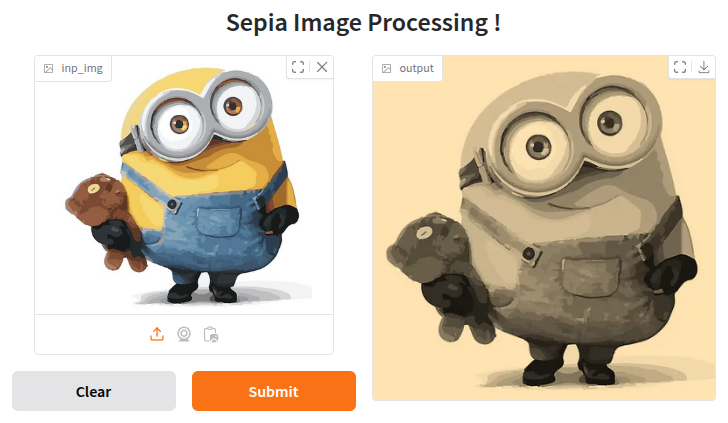
The code from sample-5.py above needs some explanation:
The class Image defines the image component that allows one to either upload an image as an input or display as an output. By default, the loaded image is passed to the Python function as a numpy array. In this case the Python function converts the provided image as a Sepia image by applying a filter.
Next, the following is our sixth Gradio Python code that tweaks the Gradio image component to pass the input image in the pillow format:
#
# @Author: Bhaskar S
# @Blog:   https://www.polarsparc.com
# @Date:   29 Mar 2025
#

from PIL import ImageOps
import gradio as gr

# Apply Grayscale filter to the input image (as a pillow image)
def grayscale_filter(inp_img):
  return ImageOps.grayscale(inp_img)

if __name__ == '__main__':
  # Creates a Submit and Clear buttons by default
  app = gr.Interface(
    fn=grayscale_filter,
    inputs=gr.Image(height=300, width=300, type='pil'),
    outputs='image',
    flagging_mode='never',
    title='Grayscale Image Processing !',
  )

  # Host 192.168.1.25, Port 8080
  app.launch(server_name='192.168.1.25', server_port=8080)
To execute the above Python code, execute the following command in a terminal window:
$ python sample-6.py
The output would be similar to that of Output.2 from above.
Open a browser and enter the URL link http://192.168.1.25:8080. The following illustration depicts the launched Gradio web application:
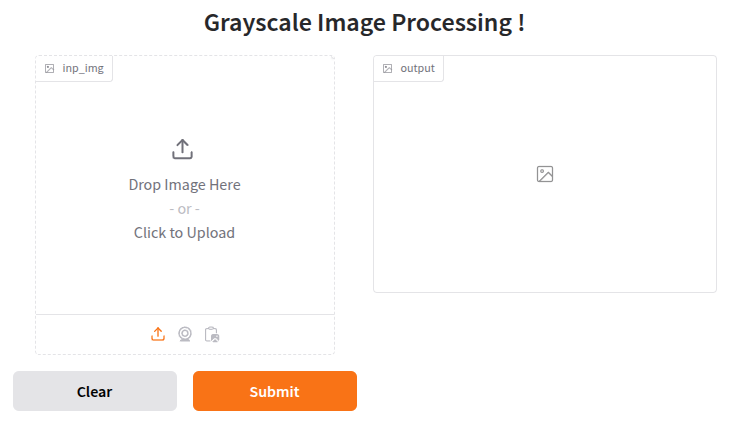
Select an image from the desktop and click on the Submit button and the following illustration depicts the outcome:
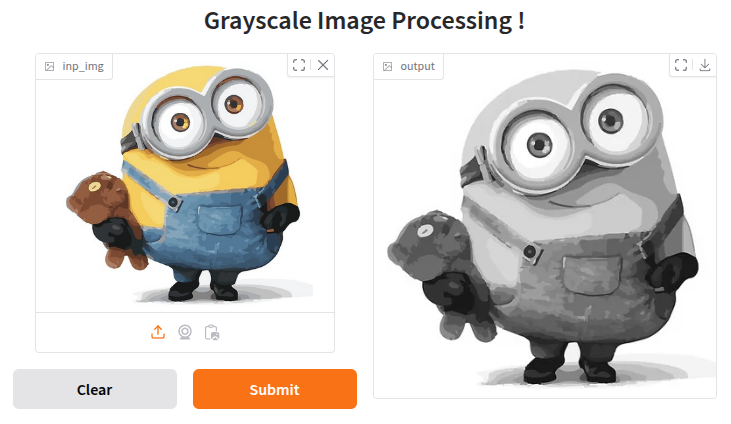
Notice that the code from sample-6.py customizes the image class by specifying the type as 'pil'. This passes the input image in the pillow format to the Python function, which converts the provided image to a grayscale image.
Moving on, the following is our seventh Gradio Python code that demonstrates how one can manage the session state in a Gradio web application:
#
# @Author: Bhaskar S
# @Blog:   https://www.polarsparc.com
# @Date:   29 Mar 2025
#

import gradio as gr

def message_with_history(message: str, history: [str]):
  json = {
      'message': message,
      'history': history[::-1]
  }
  history.append(message)
  return json, history

if __name__ == '__main__':
  # Creates a Submit and Clear buttons by default
  app = gr.Interface(
    fn=message_with_history,
    inputs=['text', gr.State([])],
    outputs=['json', gr.State()],
    flagging_mode='never',
    title='Messaging with History !',
  )

  # Host 192.168.1.25, Port 8080
  app.launch(server_name='192.168.1.25', server_port=8080)
To execute the above Python code, execute the following command in a terminal window:
$ python sample-7.py
The output would be similar to that of Output.2 from above.
Open a browser and enter the URL link http://192.168.1.25:8080. The following illustration depicts the launched Gradio web application:
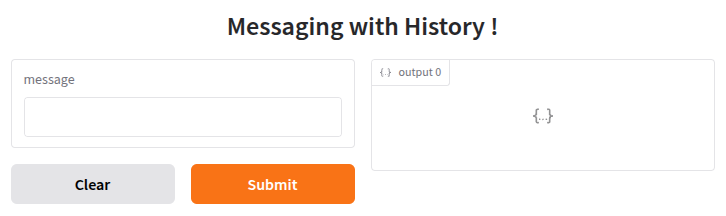
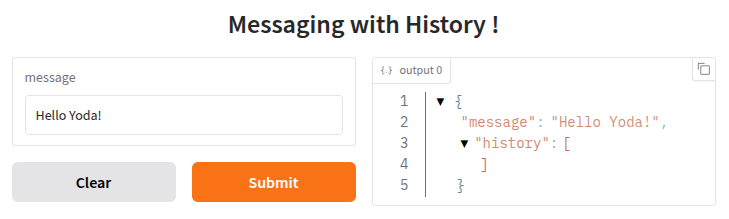
Enter a message and click on the Submit button and the following illustration depicts the outcome:
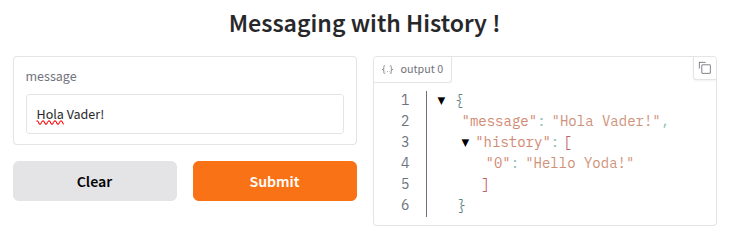
One more time, enter a new message and click on the Submit button and the following illustration depicts the outcome:
The code from sample-7.py above needs some explanation:
An instance of the class State maintains the session state across multiple submits within a web page in a Gradio web application. Also, the session state is NOT shared across multiple browser instances.
Note that an instance of State class MUST be added to both the inputs and outputs list in the Interface class. Accordingly, the Python event listener function must be tweak to pass in the session state as a history parameter and returned after the session state is updated.
Next, the following is our eighth Gradio Python code that customizes the layout of the web page using rows and columns containing the various Gradio UI components:
#
# @Author: Bhaskar S
# @Blog:   https://www.polarsparc.com
# @Date:   30 Mar 2025
#

import gradio as gr

# Interest time period : 1 year
def interest_calculator(option: str, principal: float, rate:float) -> float:
  time = 1
  if option == 'simple':
    return principal * rate / 100.00 * time
  return principal * (1 + rate / 100.0) ** time

if __name__ == '__main__':
  with gr.Blocks(theme=gr.themes.Soft()) as app:
    with gr.Row():
      with gr.Column():
        opt = gr.Radio(choices=['simple', 'compound'], value='simple', label='Type')
        pri = gr.Number(label='Principal')
        rt = gr.Number(label='Rate')
        calc_btn = gr.Button('Calculate')
      with gr.Column():
        res = gr.Number(label='Interest')
    calc_btn.click(fn=interest_calculator, inputs=[opt, pri, rt], outputs=[res])

  # Host 192.168.1.25, Port 8080
  app.launch(server_name='192.168.1.25', server_port=8080)
To execute the above Python code, execute the following command in a terminal window:
$ python sample-8.py
The output would be similar to that of Output.2 from above.
Open a browser and enter the URL link http://192.168.1.25:8080. The following illustration depicts the launched Gradio web application:
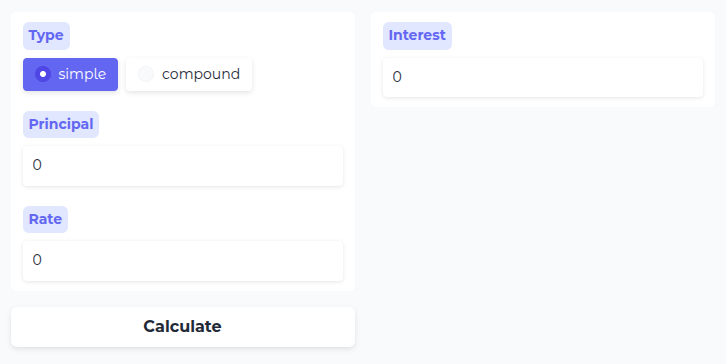
Select the interest type, enter the principal and interest rate values, and click on the Calculate button. The following illustration depicts the outcome:
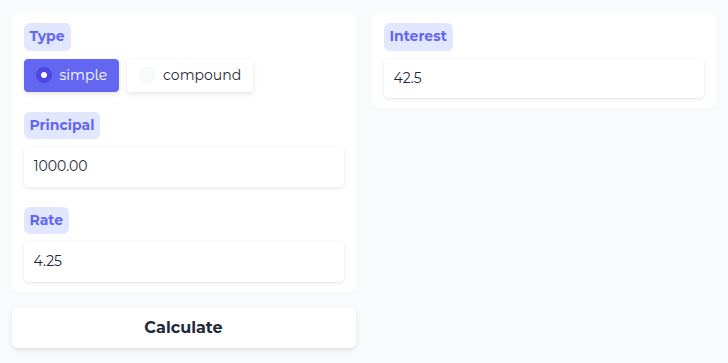
The code from sample-8.py above needs some explanation:
The theme parameter specified in the context class Block customizes the look and feel of the web page.
The UI components within the context class Row are laid out horizontally in a row.
The UI components within the context class Column are laid out vertically in a column.
Finally, the following is our ninth Gradio Python code that demonstrates how one can develop an LLM chatbot application using the Gradio UI components and the Ollama chat client:
#
# @Author: Bhaskar S
# @Blog:   https://www.polarsparc.com
# @Date:   30 Mar 2025
#

from ollama import Client
import gradio as gr

ollama_base_url = 'http://192.168.1.25:11434'

client = Client(host=ollama_base_url)

def ollama_response(option: str, temperature: float, prompt: str) -> str:
  model = 'gemma3:4b'
  if option == 'Granite-3.1':
    model = 'granite3.1-moe:1b'
  elif option == 'Phi-4':
    model = 'phi4-mini:latest'
  response = client.chat(model=model, messages=[{'role': 'user', 'content': prompt}], options={'temperature': temperature})
  return response['message']['content']

def chat_fn(option: str, temperature: float, prompt: str, history: [str]):
  response = ollama_response(option, temperature, prompt)
  history.append({'role': 'user', 'content': prompt})
  history.append({'role': 'assistant', 'content': response})
  return '', history

if __name__ == '__main__':
  with gr.Blocks(theme=gr.themes.Base(), title='Ollama Chatbot') as app:
    with gr.Column():
      cbt = gr.Chatbot(type='messages')
      mod = gr.Radio(choices=['Gemma-3', 'Granite-3.1', 'Phi-4'], value='Gemma-3', label='Model')
      tmp = gr.Slider(label='Temperature', minimum=0.0, maximum=1.0, step=0.1, value=0.0)
      msg = gr.Text(label='Prompt', placeholder='Enter prompt here ...')
      sub_btn = gr.Button('Submit')
      clr_btn = gr.ClearButton([msg])
    sub_btn.click(fn=chat_fn, inputs=[mod, tmp, msg, cbt], outputs=[msg, cbt])

  # Host 192.168.1.25, Port 8080
  app.launch(server_name='192.168.1.25', server_port=8080)
As a prerequisite, start the Ollama platform by executing the following command in the terminal window:
$ docker run --rm --name ollama --gpus=all --network=host -p 192.168.1.25:11434:11434 -v $HOME/.ollama:/root/.ollama ollama/ollama:0.6.2
The following should be the typical trimmed output:
-----[TRIM]-----
2025/04/05 19:57:57 routes.go:1230: INFO server config env="map[CUDA_VISIBLE_DEVICES: GPU_DEVICE_ORDINAL: HIP_VISIBLE_DEVICES: HSA_OVERRIDE_GFX_VERSION: HTTPS_PROXY: HTTP_PROXY: NO_PROXY: OLLAMA_CONTEXT_LENGTH:2048 OLLAMA_DEBUG:false OLLAMA_FLASH_ATTENTION:false OLLAMA_GPU_OVERHEAD:0 OLLAMA_HOST:http://0.0.0.0:11434 OLLAMA_INTEL_GPU:false OLLAMA_KEEP_ALIVE:5m0s OLLAMA_KV_CACHE_TYPE: OLLAMA_LLM_LIBRARY: OLLAMA_LOAD_TIMEOUT:5m0s OLLAMA_MAX_LOADED_MODELS:0 OLLAMA_MAX_QUEUE:512 OLLAMA_MODELS:/root/.ollama/models OLLAMA_MULTIUSER_CACHE:false OLLAMA_NEW_ENGINE:false OLLAMA_NOHISTORY:false OLLAMA_NOPRUNE:false OLLAMA_NUM_PARALLEL:0 OLLAMA_ORIGINS:[http://localhost https://localhost http://localhost:* https://localhost:* http://127.0.0.1 https://127.0.0.1 http://127.0.0.1:* https://127.0.0.1:* http://0.0.0.0 https://0.0.0.0 http://0.0.0.0:* https://0.0.0.0:* app://* file://* tauri://* vscode-webview://* vscode-file://*] OLLAMA_SCHED_SPREAD:false ROCR_VISIBLE_DEVICES: http_proxy: https_proxy: no_proxy:]"
time=2025-04-05T19:57:57.760Z level=INFO source=images.go:432 msg="total blobs: 19"
time=2025-04-05T19:57:57.760Z level=INFO source=images.go:439 msg="total unused blobs removed: 0"
time=2025-04-05T19:57:57.760Z level=INFO source=routes.go:1297 msg="Listening on [::]:11434 (version 0.6.2)"
time=2025-04-05T19:57:57.761Z level=INFO source=gpu.go:217 msg="looking for compatible GPUs"
time=2025-04-05T19:57:57.872Z level=INFO source=types.go:130 msg="inference compute" id=GPU-a66f63e7-5788-2e6e-1ebf-83dfcc1b6b4e library=cuda variant=v12 compute=8.9 driver=12.4 name="NVIDIA GeForce RTX 4060 Ti" total="15.7 GiB" available="14.8 GiB"
Next, to execute the above Python code, execute the following command in a terminal window:
$ python sample-9.py
The output would be similar to that of Output.2 from above.
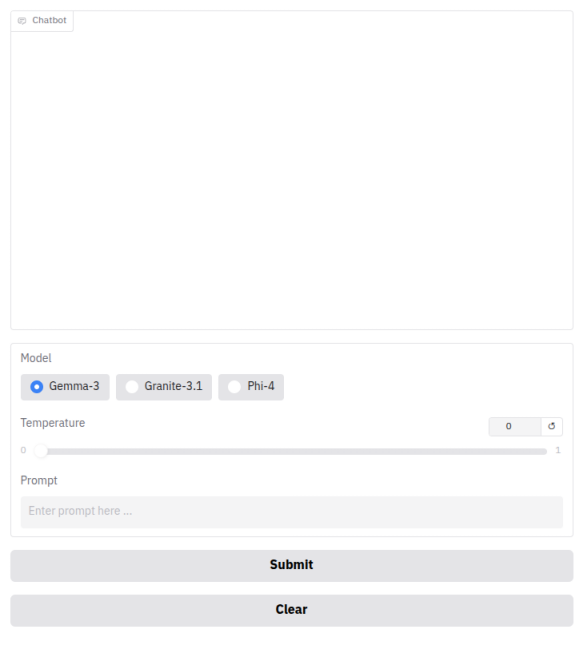
Open a browser and enter the URL link http://192.168.1.25:8080. The following illustration depicts the launched Gradio web application:
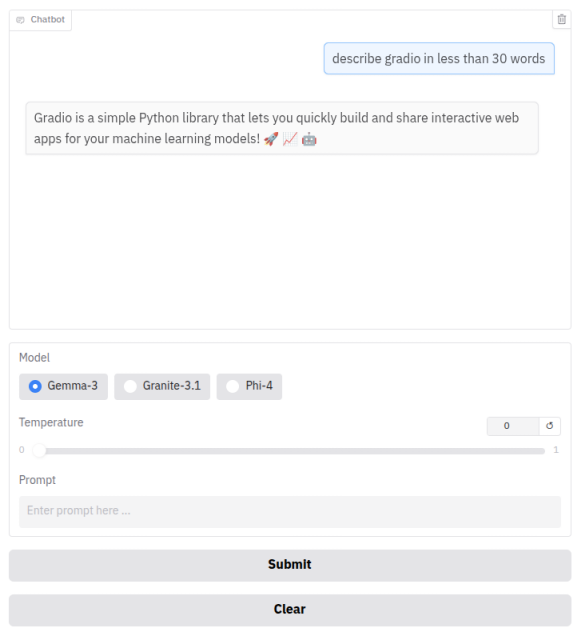
Type in a prompt and click on the Submit button. The following illustration depicts the outcome:
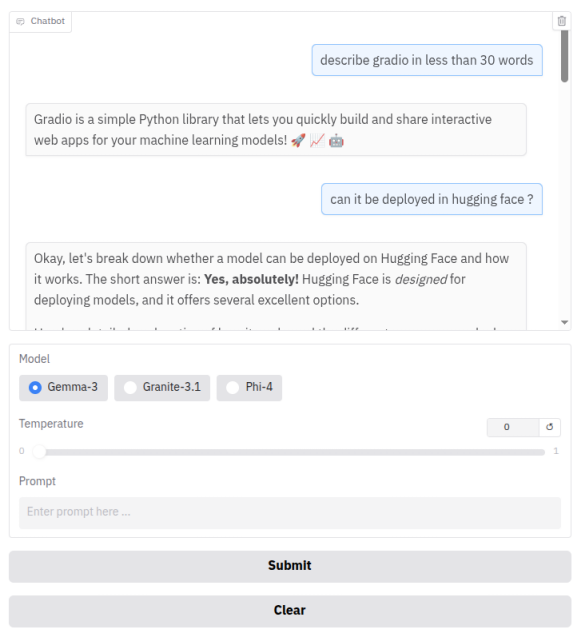
Key in a related prompt and click on the Submit button. The following illustration depicts the outcome:
The code from sample-9.py above needs some explanation:
The class Chatbot creates a chatbot UI component that displays the user prompts and the LLM responses. Note that it is initialized with a type parameter of 'messages'.
The data sent to and from the chatbot MUST be a list of dictionaries with role and content keys. This format is compliant with the format expected by most LLM APIs including the Ollama.
With this, we conclude the various demonstrations on using the Gradio framework for building and deploying AI/ML web applications !!!
References