Quick Primer on Raspberry Pi 5 Build
Raspberry Pi 5 is a very popular and powerful single board computer (SBC) that can be used
for a range of purposes, including Internet of Things (IoT) projects as well as general computing
experiments.
The Raspberry Pi platform provides support for a number of hardware accessories, in the form of
extensions, such as an NvMe drive or a Camera, which are often referred
to as Hardware Attached on Top (or HAT for short).
In this article, we will demonstrate how one can setup a Raspberry Pi 5 computer with 8 GB RAM
and an M.2 HAT (NVMe SSD) for faster computing needs.
The following are the list of items needed for the Raspberry Pi 5 with M.2 drive setup:
This is all the hardware parts we need to get started.
In order to flash the 256 GB NVMe SSD with the Raspberry Pi OS, we will make use of a Ubuntu 24.04 LTS
based Linux desktop to install the necessary utility by executing the following command in a terminal window:
$ sudo apt install rpi-imager -y
To launch the Raspberry Pi Imager utility, execute the following command in a terminal window:
-
The following illustration depicts the imager screen:
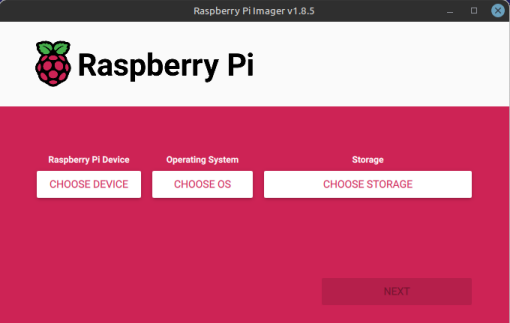
Figure.6
-
Click on the CHOOSE DEVICE option to display the following screen:
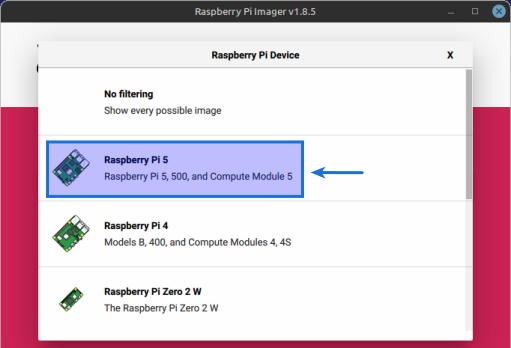
Figure.7
-
Choose the Raspberry Pi 5 option and the screen will go back to the one in Figure.6, then click
on the CHOOSE OS option to display the following screen:
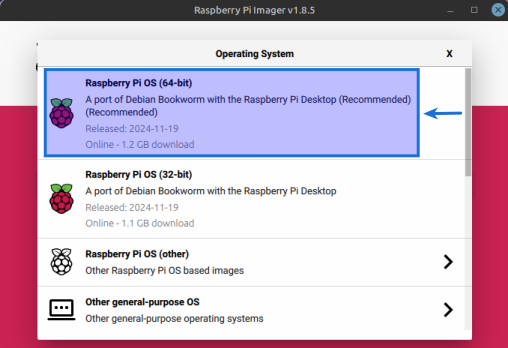
Figure.8
-
Choose the Raspberry Pi OS (64-bit) option and the screen will go back to the one in Figure.6,
then click on the CHOOSE STORAGE option to display the following screen:
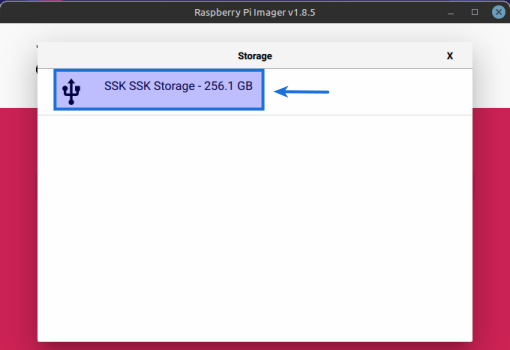
Figure.9
-
Choose the SSK Storage 256 GB option and the screen will go back to the one in Figure.6 with
all the selected options, then click on the NEXT button as shown below:
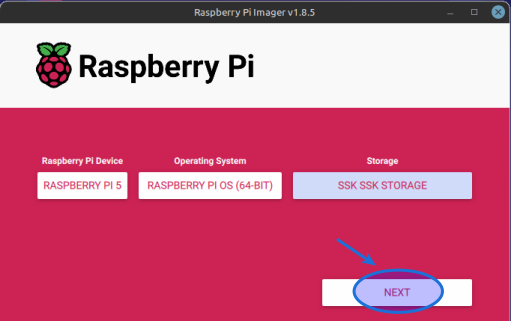
Figure.10
-
We need to customize the Raspberry Pi OS and hence click on the EDIT
SETTINGS button as shown below:
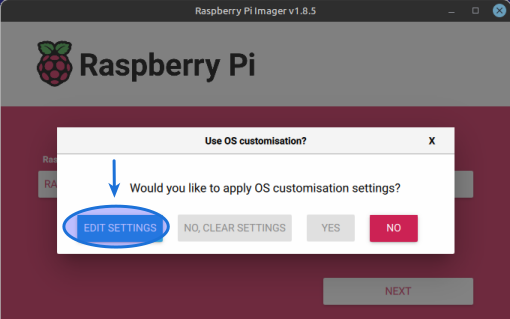
Figure.11
-
In the GENERAL tab, enter the hostname, the username & password, the Wifi SSID & password,
select the desired locale settings and finally click on the SAVE button as shown below:

Figure.12
-
In the SERVICES tab, enable ssh and click on the SAVE button as
shown below:
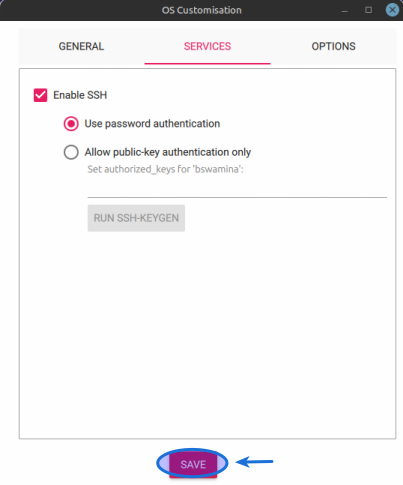
Figure.13
-
The above action will take us back to the screen of Figure.11, at which point, click on the YES
button as shown below:
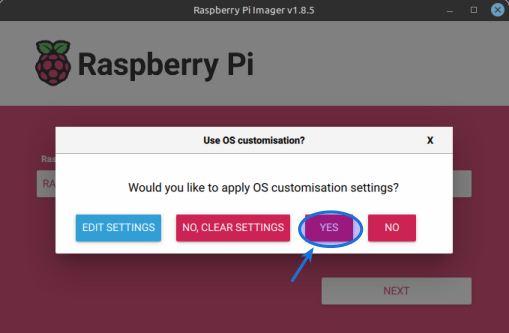
Figure.14
-
In the next screen, click on the YES button to begin the OS installation as shown below:
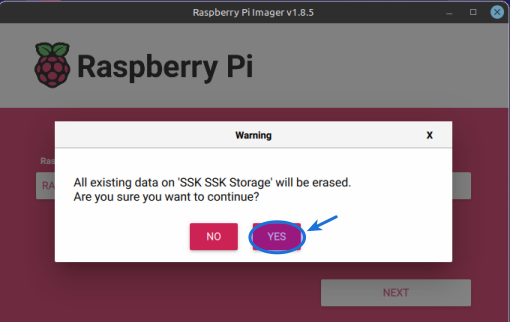
Figure.15
-
Once the Raspberry Pi OS installation completes, click on the CONTINUE
button as shown below:
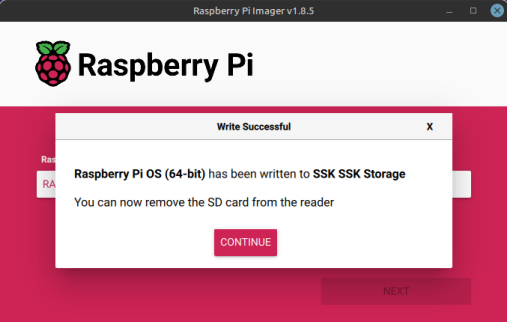
Figure.16
This completes the Raspberry Pi OS install on the NVMe drive !
The next set of steps is to put together the hardware parts to assemble the Raspberry Pi 5 general
purpose computer.
The following are the steps to assemble the Raspberry Pi 5 SBC:
-
Remove the cap from the fan header on the Raspberry Pi 5 as shown below:
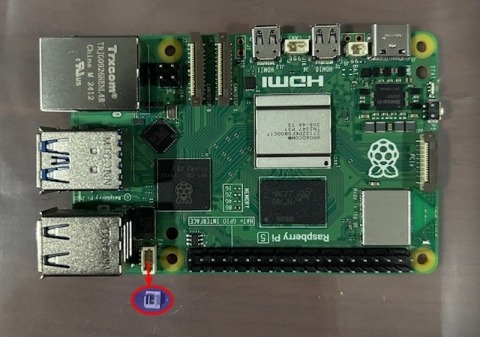
Figure.17
-
Mount the active cooler to the Raspberry Pi 5 by pressing on the hexagon spring-loaded push
pins (circled in yellow with the number (1)) and then connect the fan connector cable to the fan header (circled in red
with the number (2)) as shown below:
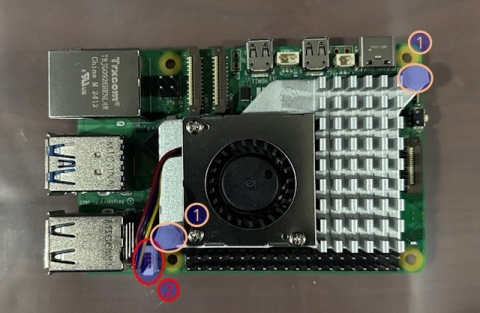
Figure.18
-
Mount the standoffs on the 4 corners of the Raspberry Pi 5 as shown below:
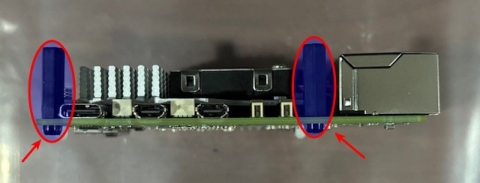
Figure.19
-
Attach the 256 GB NVMe drive to the M.2 HAT as shown below:
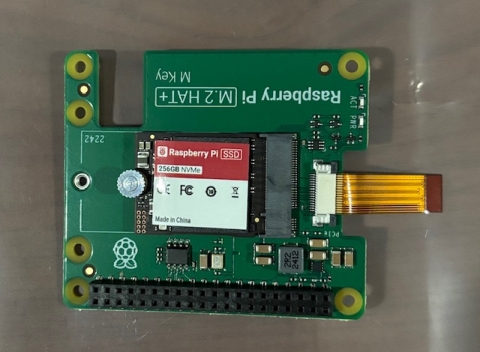
Figure.20
-
Attach the GPIO stacking header to the M.2 HAT as shown below:

Figure.21
-
Lift the PCIe connector latch up on the Raspberry Pi 5 and slide the M.2 HAT cable into the
PCIe connector as shown below:
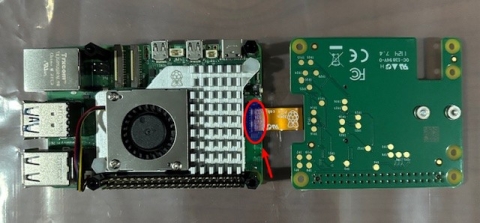
Figure.22
-
Mount the M.2 HAT on top of the Raspberry Pi 5 standoffs with the screws (circled in yellow
with the number (1)) and finally push the PCIe connector latch down (circled in red with the number (2)) as shown below:
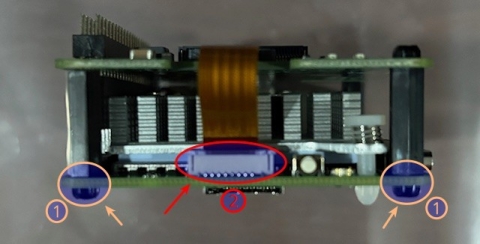
Figure.23
-
The following is the fully assembled Raspberry Pi 5 SBC:
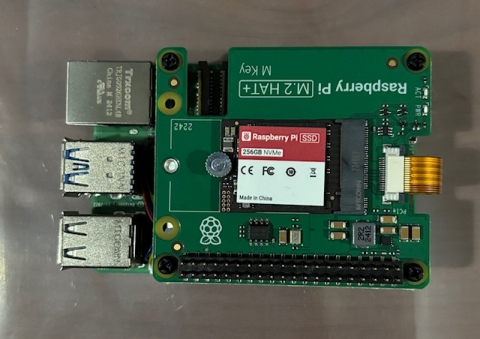
Figure.24
This completes the Raspberry Pi 5 software and hardware setup and will be fully functional !
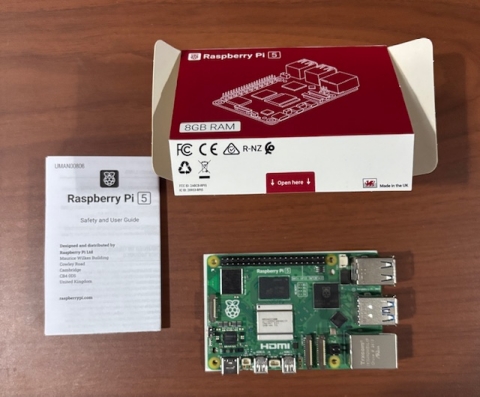 Figure.1
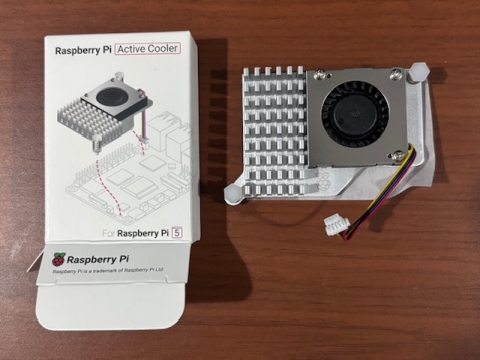 Figure.2
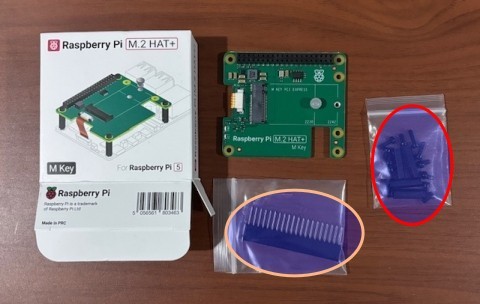 Figure.3
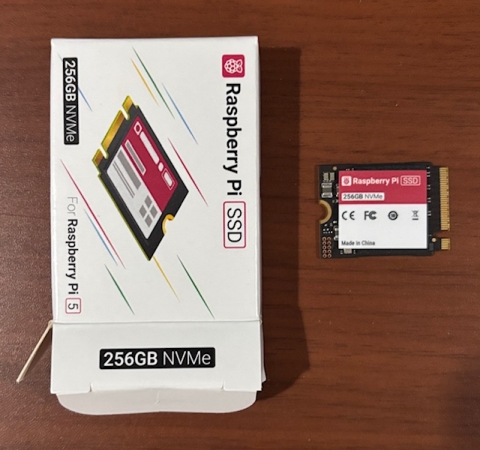 Figure.4
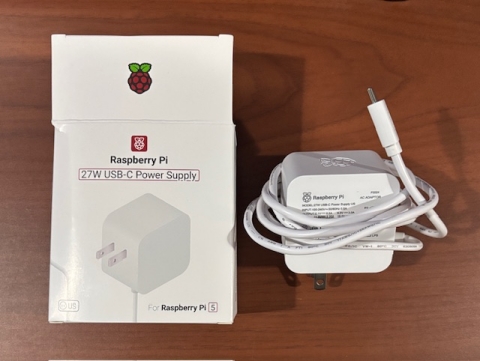 Figure.5